If you have been following fashion (or social media), you likely already know that upcycling is trending more than ever as designers and DIY enthusiasts showcase how to repurpose items and reduce waste.
 At Goodwill of Greater Detroit, however, upcycling is more than just another trend – it is part of who we are.
Our goal is to make secondhand more accessible and, in turn, increase community participation in a more circular economy where creativity, sustainability and purpose work hand-in-hand.
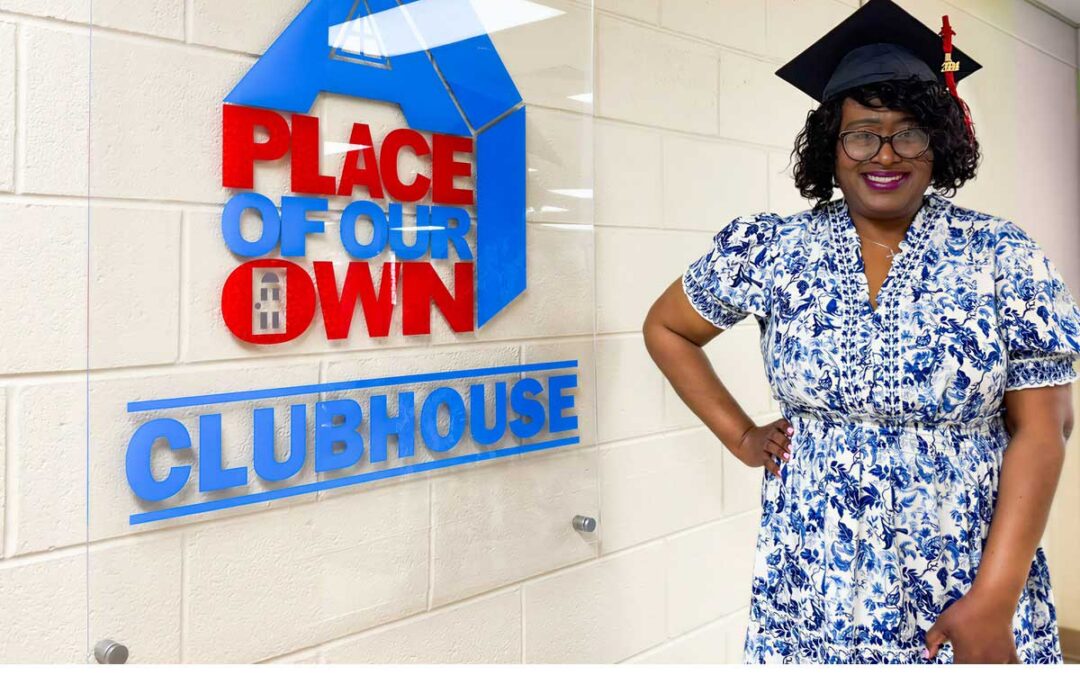
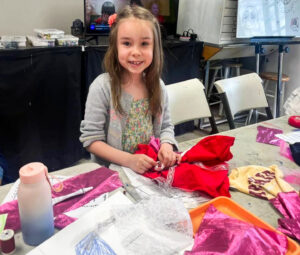
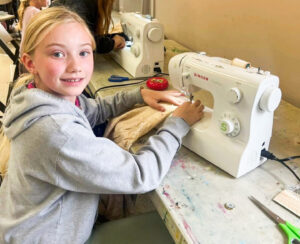
To bring this to life, Goodwill of Greater Detroit recently supported MP Global Foundation event designed to teach kids the art of upcycling. MP Global Foundation is a 501(c)(3) nonprofit organization dedicated to empowering communities worldwide through education, skill development and sustainable initiatives by.
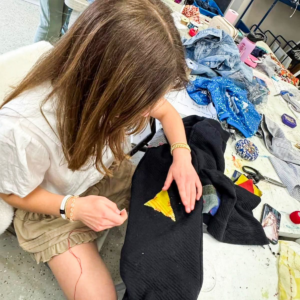
During the event, students transformed secondhand clothing from Goodwill stores into something entirely new.
This seemingly small activity unleashed profound creativity and highlighted for participating students the important benefits of upcycling to both the planet and its people.
In honor of World Upcycling Day, we invite you to do the same.
Whether you are getting rid of outdated items from your own home, or you are shopping secondhand stores, you are giving new life to the items around you. And, with a little creativity, you can change even the simplest items into something useful and entirely new.
To help get you in the right mindset, here are few tips.
Look Beyond the Frame: Spotting Art with Upcycling Potential
New artwork is a thrift store staple. Each piece has endless potential beyond what’s in the frame.
One of our favorite ways to create new art is to start with a pre-loved canvas. Some tips for painting over a canvas with an existing design include:
- Clean the Canvas: Use a damp cloth or paper towel and gently wipe the surface of the canvas down to remove any dirt or dust particles. You will want to give your canvas time to fully dry.
- Sand down any raised areas: If your pre-loved canvas features a raised design or texture, use a fine-grit sandpaper (a 220-320 grit is a good starting point) to gently flatten the surface. Be careful not to apply too much pressure as this can put holes in the surface.
- Pick a background color: If your canvas features a dark background, consider doing a layer or two of white paint before beginning your own unique design. This will ensure you have a clean slate. If your intent is to lean into darker hues (i.e. a nighttime water scene), you can start by setting down the foundation for the night sky with a black and use a deep blue for the water. You can always go back in with lighter colors after to bring dimension.
- Hint: Acrylic paint is typically best for painting over old canvases.
- Get creative: With your background set, don’t be afraid to get creative. Art is in the eye of the beholder. If you like it, that is all that matters!
If painting is not your style, there are plenty of other ways you can transform art and decorative pieces from secondhand stores. For example, you can turn a decorative plate into 3D wall art by adding a unique frame around it, or you can elevate your at-home photo wall by swapping out traditional frames with thrifted colored or textured frames.
Regardless of what path you choose, just remember that with a new coat of paint, imagination and a willingness to try something new or unexpected, the possibilities are endless.
From Worn to Reborn: Turn Clothing into Something New
How many times have you fallen in love with an article of clothing, but it wasn’t your size? Before you let it go, consider this: You have an opportunity to create something unexpected.
The key is in your imagination.
Clothing can be repurposed into fabric art, quilts, pillowcases, fabric necklaces, plant hangers and more.
A concert T-shirt, vintage dress or jacket, or an oversized sweater may not be the wearable you are looking for, but it can be transformed into something you can love for years to come.
If you need some inspiration, Heather Dessinger of Mommypotamus has a tried-and-true way of turning a T-shirt into a tote bag. Heather’s instructions include:
- Step 1: Cut the sleeves off right along the seam.
- Step 2: Cut along the neckline – this will give you a halfmoon shape.
- Step 3: Determine the depth you want for your bag by drawing a line across the shirt. If you want a deeper bag, leave at least two inches at the bottom of the shirt.
- Step 4: Cut fringes along the bottom of your shirt. The fringes should reach the line that you drew for the depth of your bag. Try to keep your fringes to about an inch wide (similar to how you would make a tie blanket).
- Step 5: Tie the fringes together. You will see that there are gaps between the fringes. To close those gaps, section your fringes into groups of three. The middle fringe in each set will then be tied to the left and right fringes, creating a tighter seal.
- Step 6: Feel free to tie knots in the straps or use as it!
When browsing the aisles for a piece of clothing to transform into a tote bag, look for pieces with bold patterns, interesting fabrics, vibrant colors or unique/vintage designs that speak to your personal style. Then, let your creativity shine.
From Function to Fresh: How to Upcycle Thrifted Furniture
If you find a piece of furniture that reflects your style but not your current needs, consider what you don’t see.
A step stool isn’t just for reaching high shelves. It can also function as a stylish blanket rack or plant stand.
Old, stacked suitcases are for more than travel. They can become a stylish bedroom storage unit or a makeshift bedside table.
A thrifted bookshelf can be more than a book holder. Lay it on its side and attach a half-inch piece of plywood, two-to-three-inch-thick upholstery foam and cotton batting and fabric, and you have a functional storage bench with built-in cubbies.
Or keep it simple. Repaint a piece of old furniture and add new accessories – like handles and knobs – to give it an updated look.
One of our favorite and versatile pieces to transform is a wooden ladder. You can leave as-is or give it a fresh coat of paint and use it to display your blankets. Another great use for these is for shelving. Here’s how:
- Step 1: Paint or stain the ladder to your desired shade.
- Step 2: With the ladder folded, position it horizontally on its side. This should bring the two sides together to create about a 5” “shelf.” For additional security, think about tying the two sides together to avoid separation.
- Step 3: Attach the ladder to your wall with “L” shaped brackets. If your ladder steps progressively get narrower, you will need to affix your “L” brackets at different heights to keep your “shelf” portion is level.
- Step 4: Decorate with items of your choosing, including flowers, books, candles, etc.
Start Seeing Secondhand Differently
With a few basic craft supplies and a healthy dose of inspiration, the possibilities for upcycling are endless.